Step one, register an account at the domain registrar of your choice. I've heard too many stories of people not completing the purchase of their domain only finding out later that it's been purchased in the mean time and parked. (With the added bonus of costing significantly more.) I chose to use https://www.namecheap.com and as part of the registration process, I chose to pre-load my account with some funds.
Step two, register the domain. Now I am wishing I had taken screen shots of the process. It was pretty straight forward to go through the process. I did elect to get the "free" email service using https://privateemail.com which is also a namecheap service.

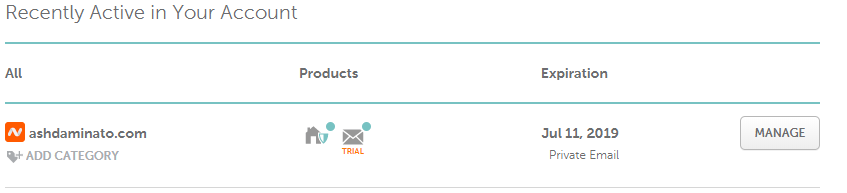
It is a free trial for two months but only costs $10 a year. For years, I was paying more to Yahoo! for the privilege of being able to POP email. When you registered for the Private Email service, you would have been sent an email with the username and password for the email account. So the first thing to do is change the password to your new email address. Log in with your provided credentials.

Click the hamburger:
Then settings:

Scroll down until you find change password:

And finally change your password. You'll have to log back in at this point if you want to explore any of the other settings.

I also chose to use the free WhoisGuard which is a whois anonymizer and also a namecheap service.

If you are not familiar with what a whois anonymizer is and why one would need to use the service, read on, otherwise skip below. In the early days of the internet, whois was a service that allowed one to retrieve contact information about a domain for such things as who the real owner of the domain is(in the past, a way to tell if a site is legitimate), report misbehaving services or other abuse taking place at the site. The whois command will typically come installed on any Linux system as part of setting up the network services. It is typically available as a webservice by many domain registrars and some third parties as well. For most domains, I typically use the webservice provided by ICANN at https://whois.icann.org. For some top level domains, the webservice is only available from a resellers of those domains. Some bad actors realized they could harvest email addresses by abusing the domain registry service and sending spam. Anonymizers help to protect your information and will filter spam but forward legitimate inquires to the correct parties. whois entries for protected domains will typically look like this:

Next step, setup gmail to send and receive email from privateemail.com:
In gmail, hit that gear in the top right corner
 |
| Click the gear |
Then settings

Then select Accounts and Import
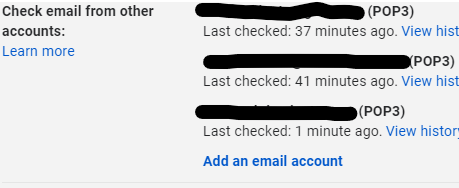
Scroll down until you find Check email from other accounts, then click on Add an email account:

Next scroll down to add an email address to send email from:

There will be two dialog boxes this time. The first you enter your name and the new email address.

Google auto-guessed the STMP server to be mx2.privateemail.com and the Username as ash. These both had to be changed to mail.privateemail.com and the full email address. Either tls or ssl should work but they both use different ports. Again, refer to the reference provided by namespace here.

With the email sorted out, it's now time to point the domain to the blog. We'll be switching back and forth between blogger.com and namecheap.com while we do this. namecheap will park your domain for you and this will have to change the cname records. We'll start with blogger.com since they give you instructions on what to change the cname records to. Since I've already gone through this with this blog, I have an older, unused blog through blogger that I'll walk through here.
In the blogger dashboard, go to settings.

Next, find the section for publish and click +Set up a third-party URL for your blog.

Next, add what address the blog should appear at ( something like blog.yourdomain.tld)

Next, google will tell you to create some cname records.


This time, when adding a new record, select a CAA record. Enter the domain, and use letsencrypt.org as the certificate issuer.


